Payment Terminal
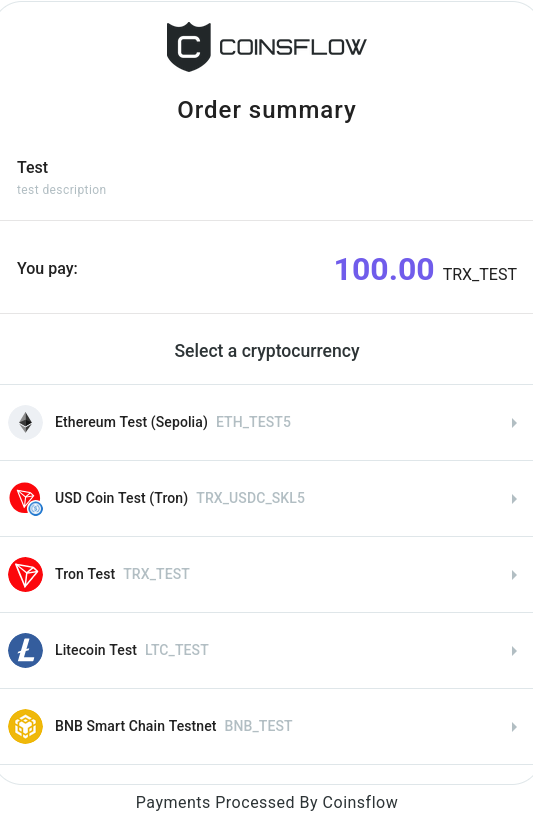
Payment terminal is a way to display payment instructions on your web page that allows your customers to pay for a service or product following the terminal instructions.
To get a payment terminal, you need to generate a GET URL with a set of the parameters and redirect your customer, via that link, to the payment terminal.
The parameters are:
| Parameter | Description | Value type | Optionality |
|---|---|---|---|
| project | The unique code that identifies the project you are associated with and where you want to create the payment terminal. Will be given to you by Coinsflow integration manager. | string | Required |
| externalId | The unique code that identifies the operation. Created on the merchant's side. | string | Required |
| requestedAsset | A unique code that identifies the cryptocurrency to be used with the payment terminal. This is the currency in which the payment amount will be displayed. Full list of assets will be given to you by Coinsflow integration manager. | string | Required |
| amount | The value to associate with the payment terminal. The amount the customer pays when using the payment terminal. | string | Required |
| order | Determines if an Order should be created alongside the Payment Terminal. | boolean | Optional |
| url | URL address of the page the user is automatically redirected to after the operation is completed and the address for the "Back" button on the Payment terminal. | string | Optional |
| successUrl | URL address of the page the user is automatically redirected to after the operation is completed successfully. | string | Optional |
| declineUrl | URL address of the page the user is automatically redirected to after the operation is failed to complete. | string | Optional |
| iframe | A boolean that determines if a link is created that allows you to embed the payment terminal code in another HTML page. | boolean | Optional (false by default) |
| paymentAsset | The unique code that identifies the desired Payment Asset you want to present to the end-user. The total amount requested in it, is an on-the-fly conversion from the “requestedAsset”, if they are different. If it is filled, there's no choice for the customer. | String | Optional |
| account | The id of the account the payment should be transfered to. If it is present, order should be false. | String (uuid) | Optional |
Concerning
successUrlanddeclineUrl:
- If
successUrlanddeclineUrlare provided together withurlin the link, the redirect is made tosuccessUrlordeclineUrl. Theurlin this case is used to link the "Return to merchant" button.- If
successUrlurl is provided withoutdeclineUrl, then the successful payment is redirected tosuccessUrl, but if it fails is redirected tourl.- If
declineUrlurl is provided withoutsuccessUrlthen successful payment is redirected tourl, and if it fails is redirected tourl.- If you just provide the url without
successUrlanddeclineUrl, in case of success or failure, the redirect tourlis performed. Provided urls | Success redirects to | Decline redirects to ---------|----------|---------successUrlanddeclineUrl|successUrl|declineUrlOnlysuccessUrl|successUrl|urlOnlydeclineUrl|url|urlNosuccessUrlanddeclineUrl|url|url
Creating a Request
-
Create a request to the following url:
- For production:
https://my.coinsflow.pl/order? - For sandbox:
https://my.sandbox.coinsflow.pl/order?
- For production:
-
Create a JSON file with the required and optional parameters:
- project: Insert the unique code that identifies your project.
- requestedAsset: Insert the unique code that identifies the desired asset.
- amount: Insert the desired amount to associate with the payment terminal.
- externalId: Insert the unique code that identifies the operation.
- iframe: Indicate if a link is created to embed the payment terminal code in another HTML page (it assumes the
falsevalue if left empty). - url: Insert the url address of the page the user is automatically redirected to after the operation is completed.
-
The request looks like this:
{
    "project":"75b5b830-4cea-48de-954d-bc3f7e1ca720",
    "requestedAsset":"a1b98c9a-e5d8-4cd2-b1be-37d05276008b",
    "amount":"1",
    "externalId":"9371c80b-d66b-4e5d-a911-b3ea3eb708ff",
    "iframe":true,
    "url":"https://example.com"
} -
Convert the code in JSON to base64 format (click here to convert.).
-
The base64 format looks like this:
e+KAnHByb2plY3TigJ064oCcNzViNWI4MzYtNGNlYS00OGRlLTk1NGQtYmMzZjdlMWNhNzIwIizigJxhc3NldOKAnTrigJxhMWI5OGM5YS1lNWQ4LTRjZDItYjFiZS0zN2QwNTI3NjAwOGLigJ0s4oCcYW1vdW504oCdOuKAnDEiLOKAnHJlZklk4oCdOuKAnDkzNzFjODBiLWQ2NmItNGU1ZC1hOTExLWIzZWEzZWI3MDhmZuKAnSzigJxhbGxvd0Nob2ljZeKAnTp0cnVlLOKAnGlmcmFtZeKAnTp0cnVlLCAidXJsIjoiaHR0cHM6Ly9leGFtcGxlLmNvbSJ9 -
Generate the hmac(sha256) hash (click here to generate):
- On "Enter Plain Text to Compute Hash", insert the json file.
- On "Enter the Secret Key", insert the provided Secret Key.
Contact your Integration Specialist/TAM to request the Secret Key for your Terminal.
- On "Select Cryptographic Hash Function", select
SHA-256, from the drop-down menu. - On "Output Text Format", select
Hex(selected by default). - Click on the "Compute Hash" button.
- Copy the "Hashed output" that looks something like this:
557dce27cfa252e1485e4d2ca9134020f2ff38f0e958489492bb3b40df65fca6018d97a703d3ff14c2117e8f068666f2464b1b6e98c5657913a9591bf27e8b35
-
Insert the “base 64 encoded json” and the "hashed output" into the terminal request, to look like this:
https://my.sandbox.coinsflow.pl/order?payload={base64 encoded json}&signature={hmac_sha256 signature of RAW JSON}
To display the terminal in dark mode, follow the step below.
The callback/response from the API call for a paid Terminal looks like this:
"terminalData": {
  "id": "6aeef1cf-7190-47d0-a719-31b17e6d763f",
  "requestedAssetAmount": "5.000000000000000000",
  "requestedAssetAmountPaid": "5.011154449145546404",
  "requestedAsset": {
		"id": "4dfb822a-2dc4-4907-9850-a7df41721fd8",
		"name": "Euro",
		"symbol": "EUR",
		"displayName": "Euro",
		"displaySymbol": "EUR",
		"exchangeSymbol": "EUR",
		"type": "FIAT",
		"subType": "FIAT",
		"token": false,
		"contract": null,
		"nativeAsset": "EUR",
		"decimals": 2,
		"network": "FIAT"
  }
}