Orders Tab
An order is a more complex version of the Payment link since it involves sub-operations. The sub-operations occur in the underpaid and overpaid scenarios.
Payment links have a requested amount (1 ETH, for example). When the end user pays it, it gets closed. It doesn't matter if the end user payed 0.1 ETH, 1ETH or 10ETH, the end result is the same.
Orders, on the other hand, have mechanisms in place to ensure that the amount you requested is met. If you enter 5 BTC but the end user pays less, it is marked as "Underpaid". Additional operations are executed to fix this.
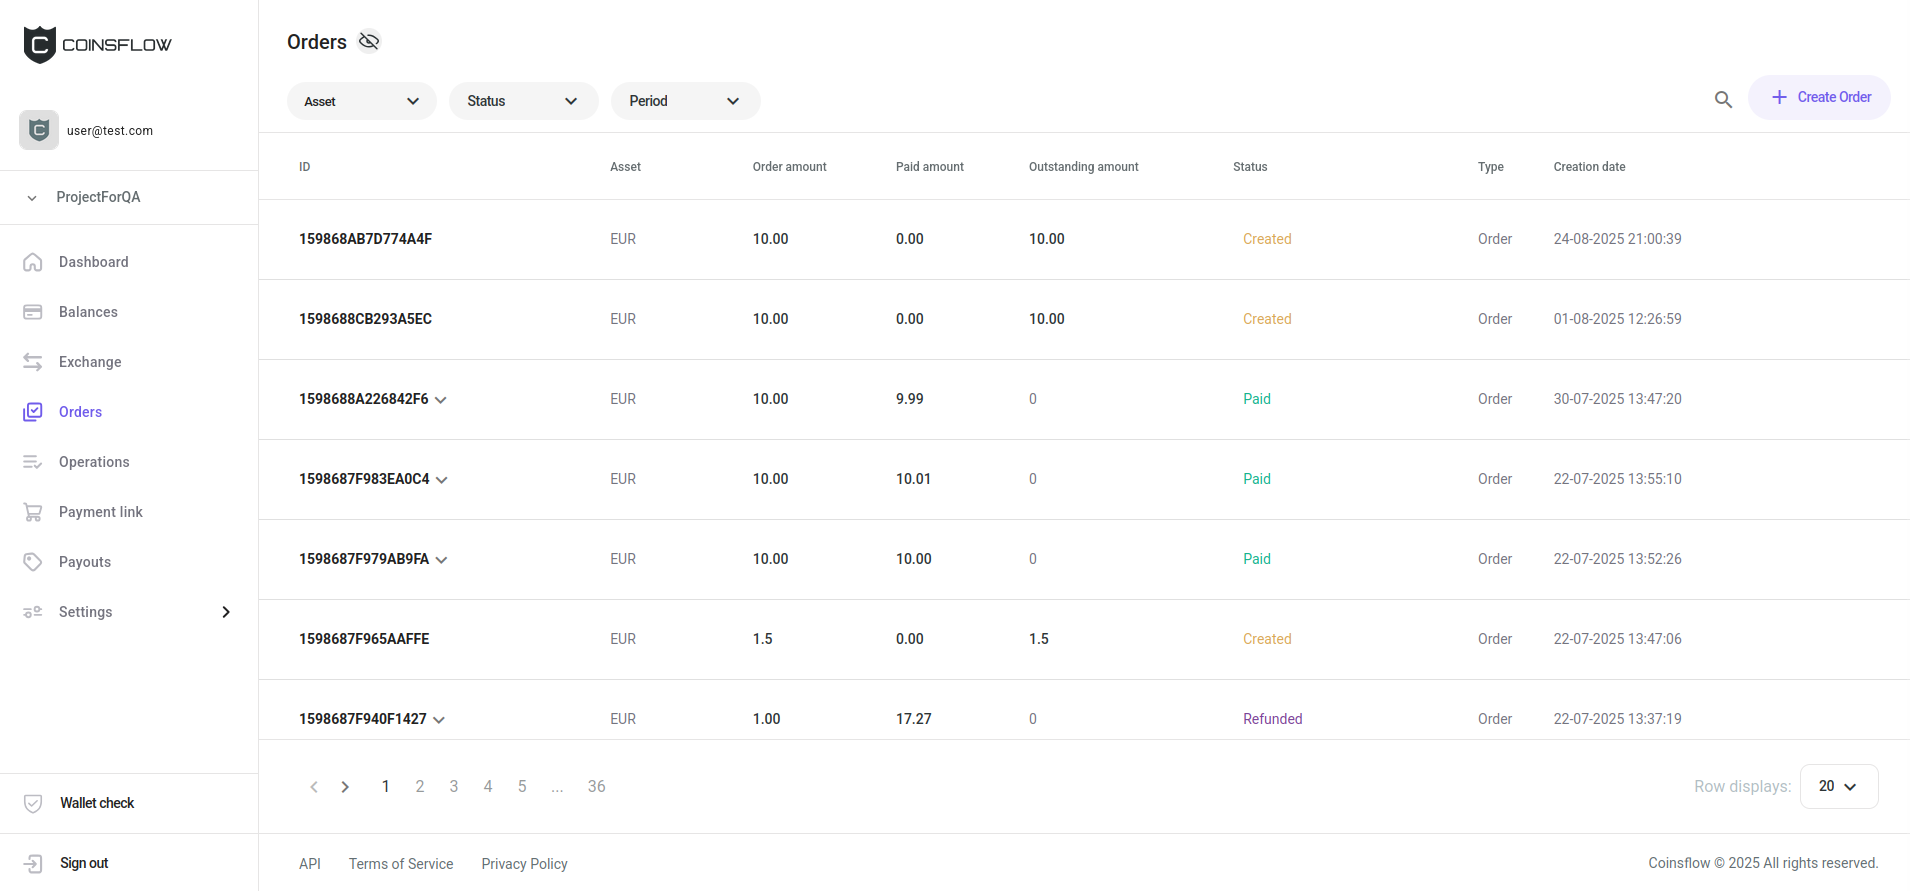
The Exchange history table displays the following information:
| Name | Description |
|---|---|
| ID | Displays the unique code that identifies the order on the platform. |
| Asset | Displays the selected crypto currency used to execute the operation. |
| Order amount | Displays the amount of the "Asset" requested on the operation. |
| Paid amount | Displays the amount of the "Asset" used on the operation. |
| Outstanding amount | Displays the amount of the "Asset" expected to achieve the "Order amount" requested on the operation. |
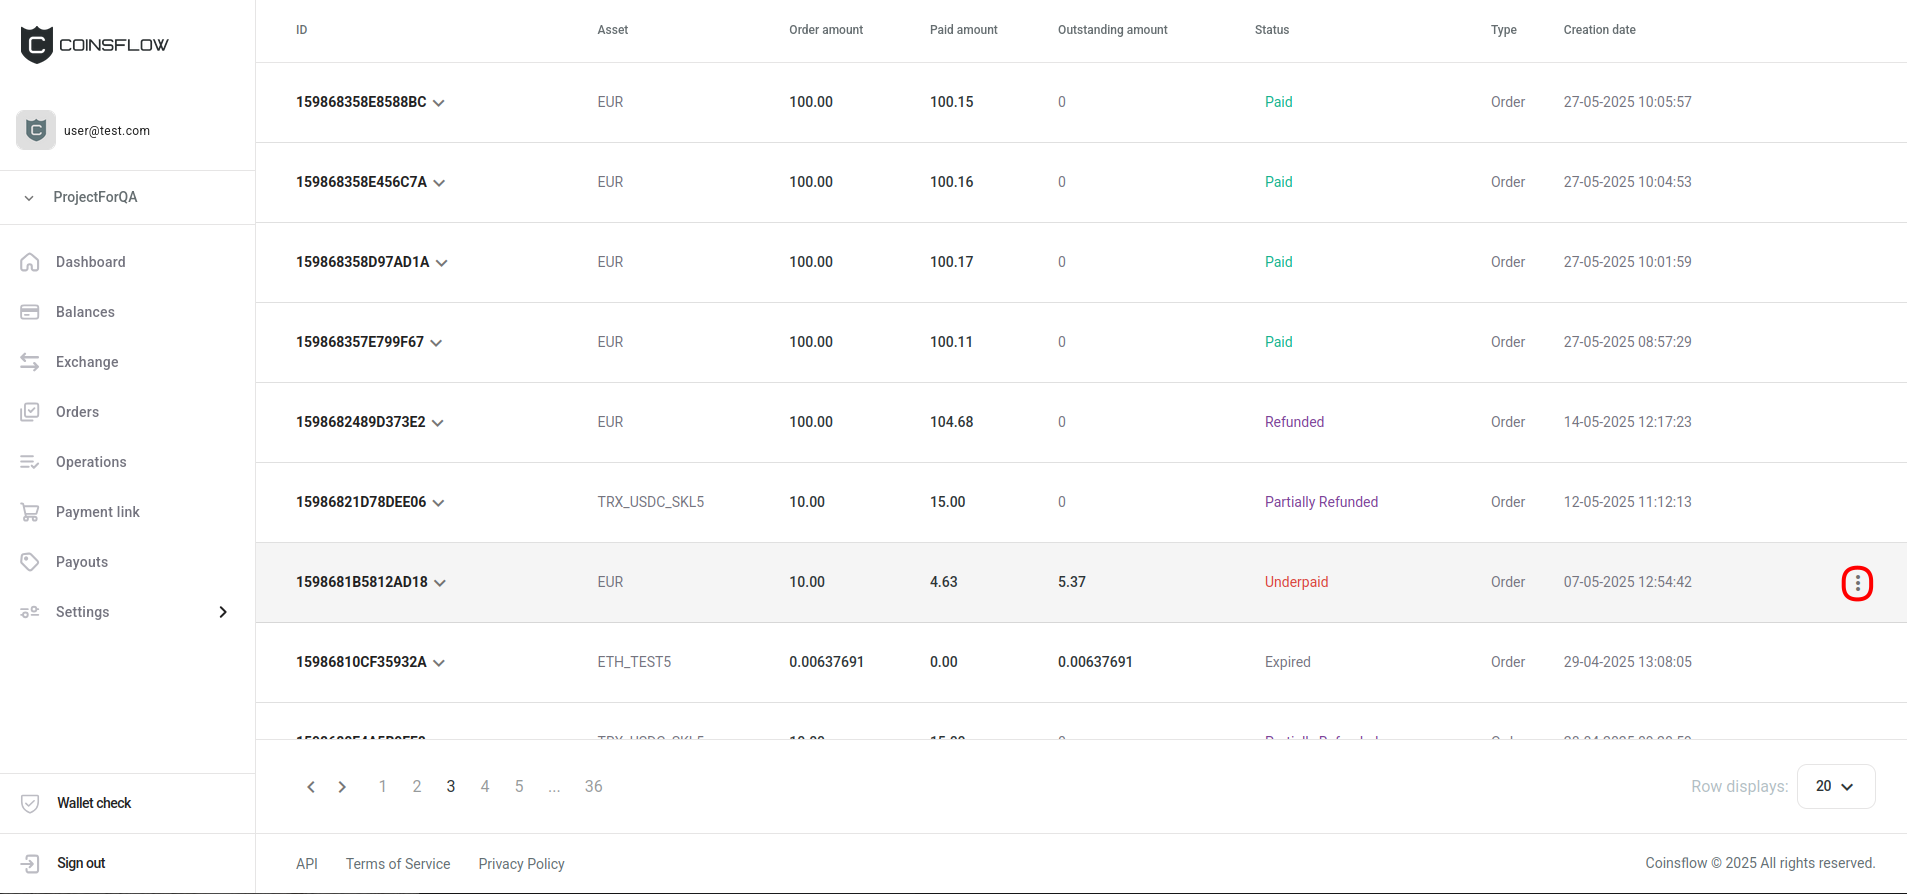
| Status | Displays the current status of the operation: Created, Pending, Processing, Paid, Underpaid, Expired, Failed, Deactivated. |
| Type | Displays the type of operation (order). |
| Creation Date | Displays the date and time the order was created. |
| Details | Button that allows you to open the order details pop-up card or to get the payment link associated with the order. The details button is hidden and is only visible when the row is hovered over. |
On the Orders tab you can:
Create Order
Create a Payment Link
-
Click on the "Create Order" button, in the top-right corner of the screen.
-
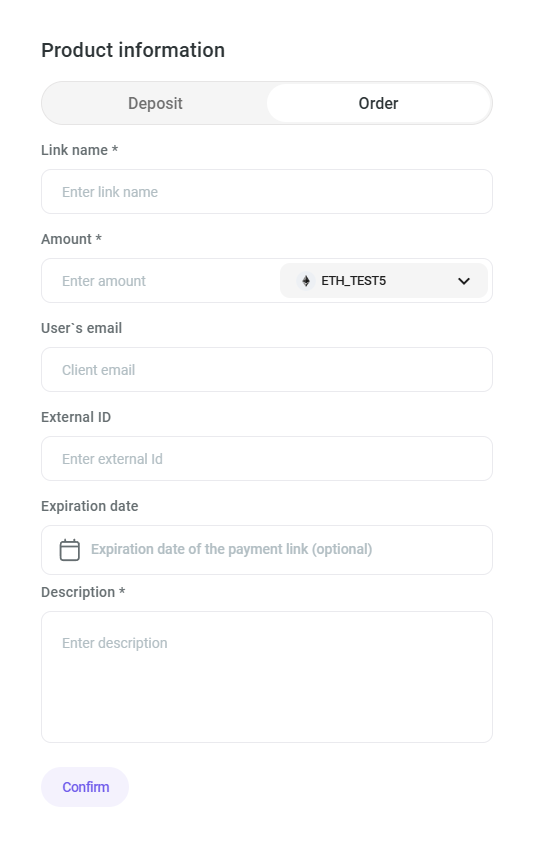
The "Product information" card is displayed:
-
Insert the desired name to identify the product on the application.
-
Insert the desired amount as the product price (this field can be left empty as it is not mandatory).
-
Select the desired crypto currency for the inserted amount.
-
Insert the desired External ID, for external purposes (this field is not mandatory, it can be left blank).
-
Select the desired date until which the link is available (this step is optional).
-
Insert the desired text to describe the product.
-
Click on the "Confirm" button to proceed.
-
The "Payment link details" pop-up card is displayed:
-
Copy the generated link.
-
Send the link to the desired customer.
To see how the payment link works on the customer side, click here.
See Orders
-
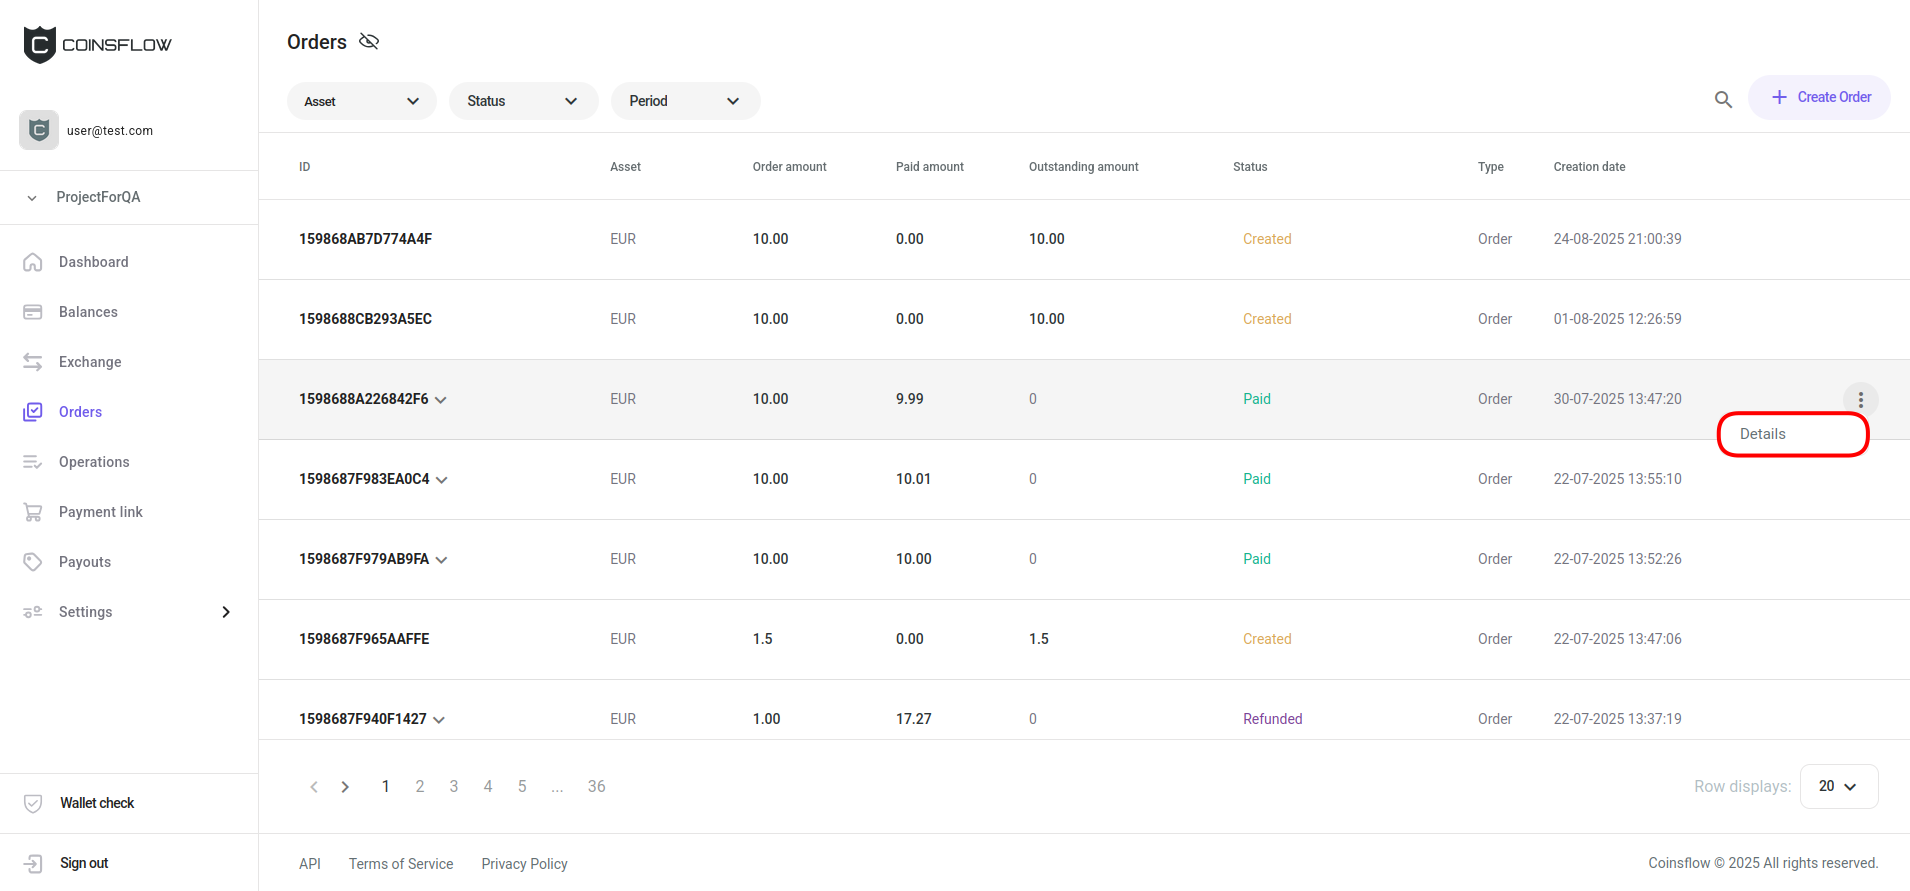
Hover over the desired order row on the Orders table and click on the "Options" button:

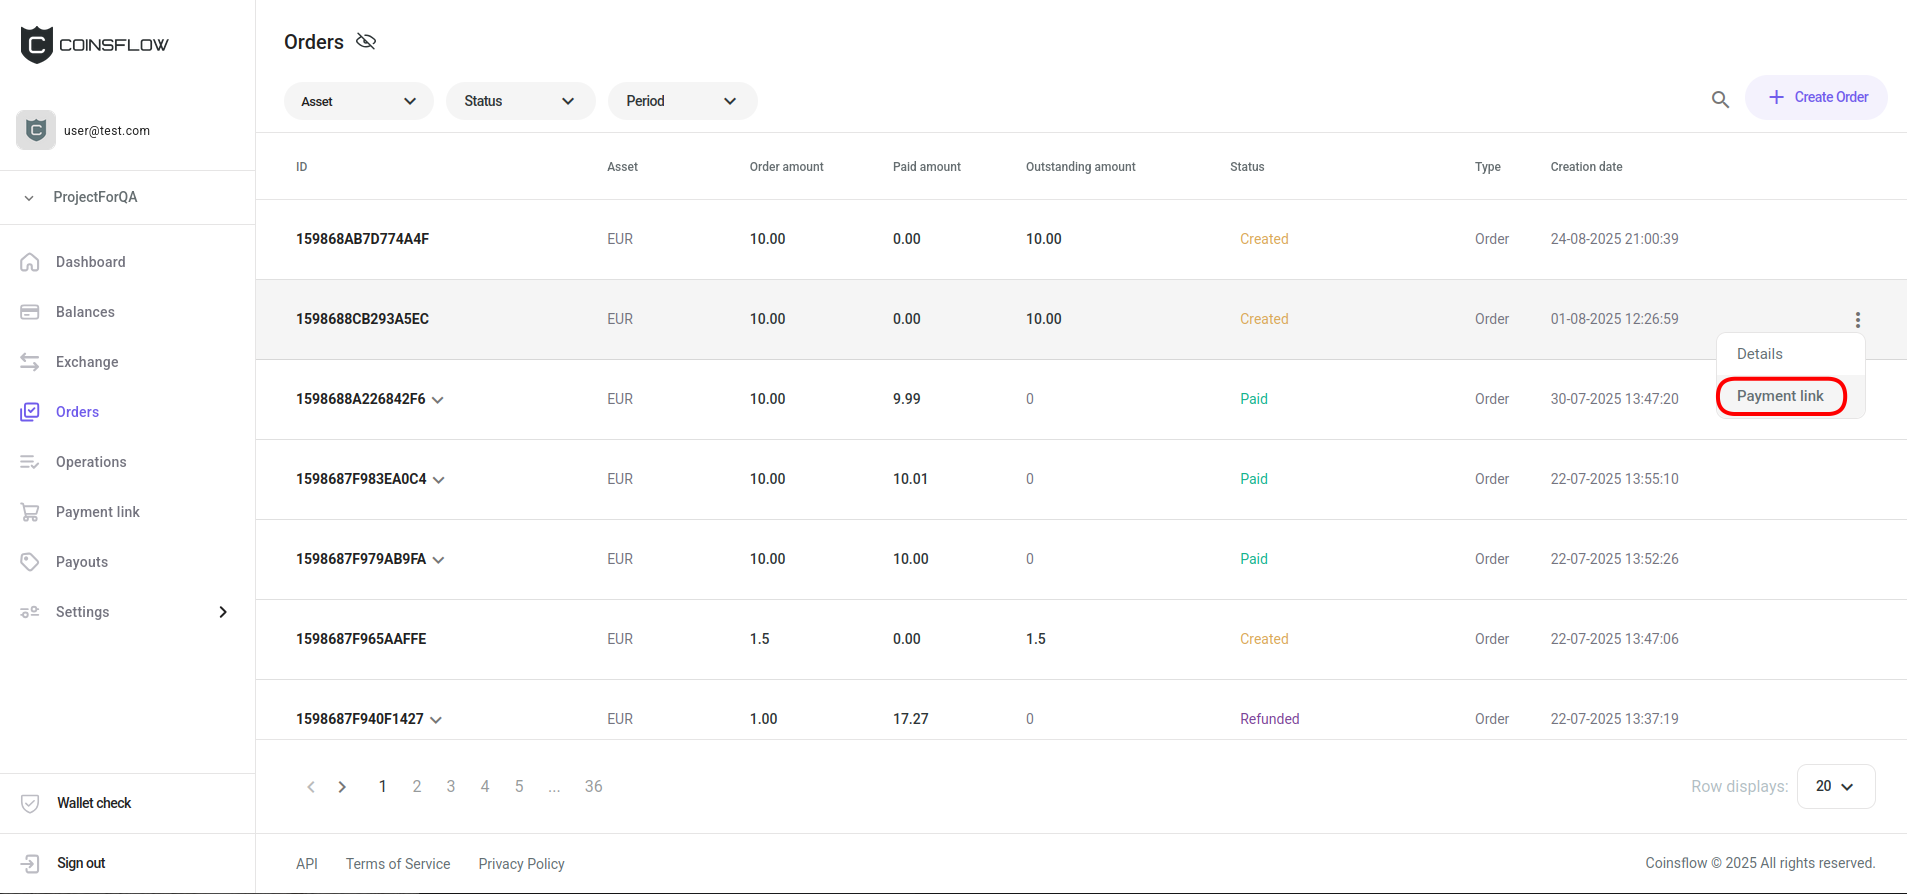
-
Click on "Details" from the drop-down menu:
-
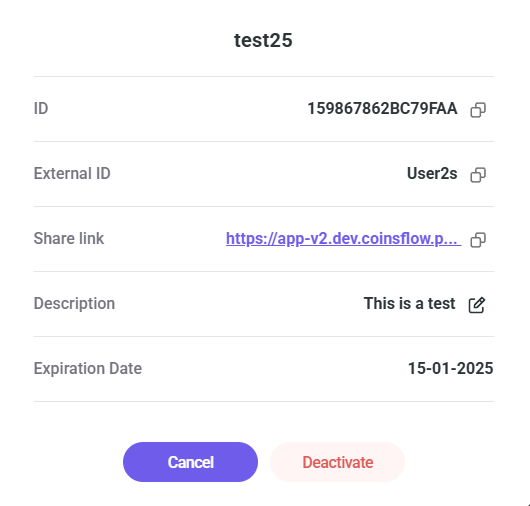
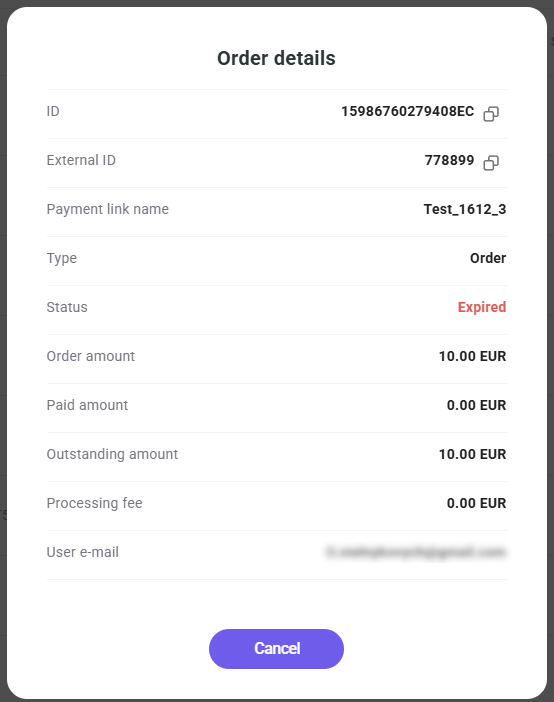
The "Order details" pop-up card is displayed:
Filter the "Orders" Table
There are two ways of filtering the "Orders" table:
- Search bar:
-
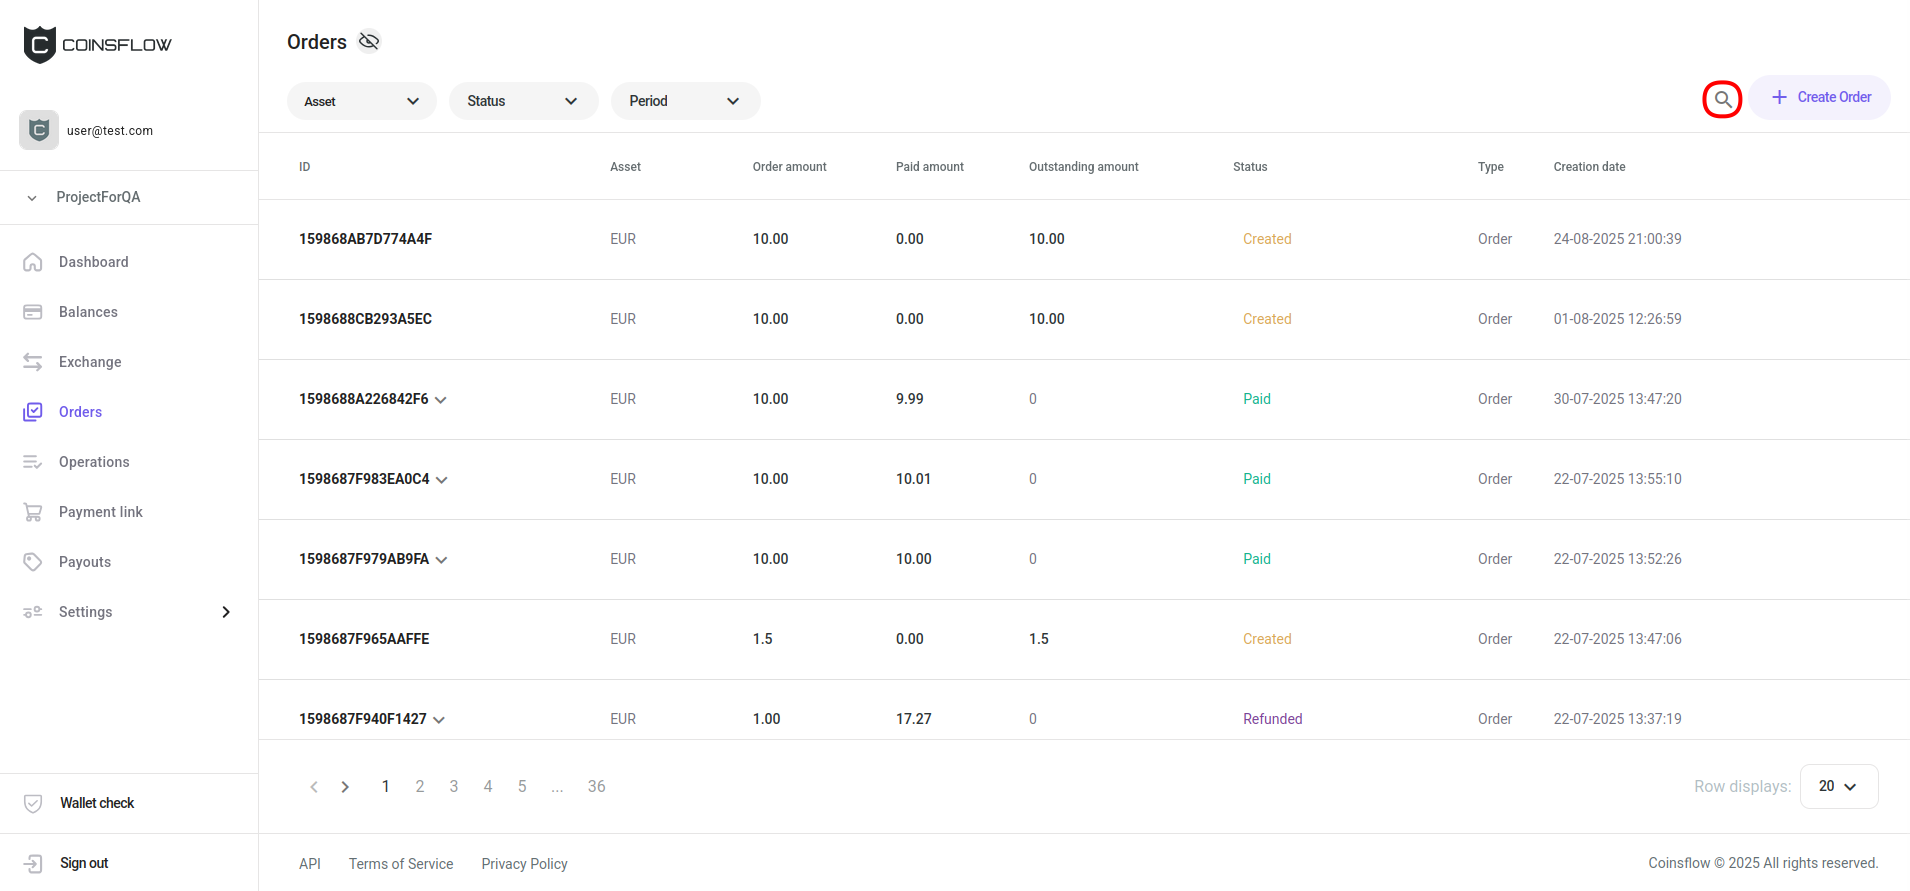
Click on the Search icon:
-
Insert the desired title into the search bar:
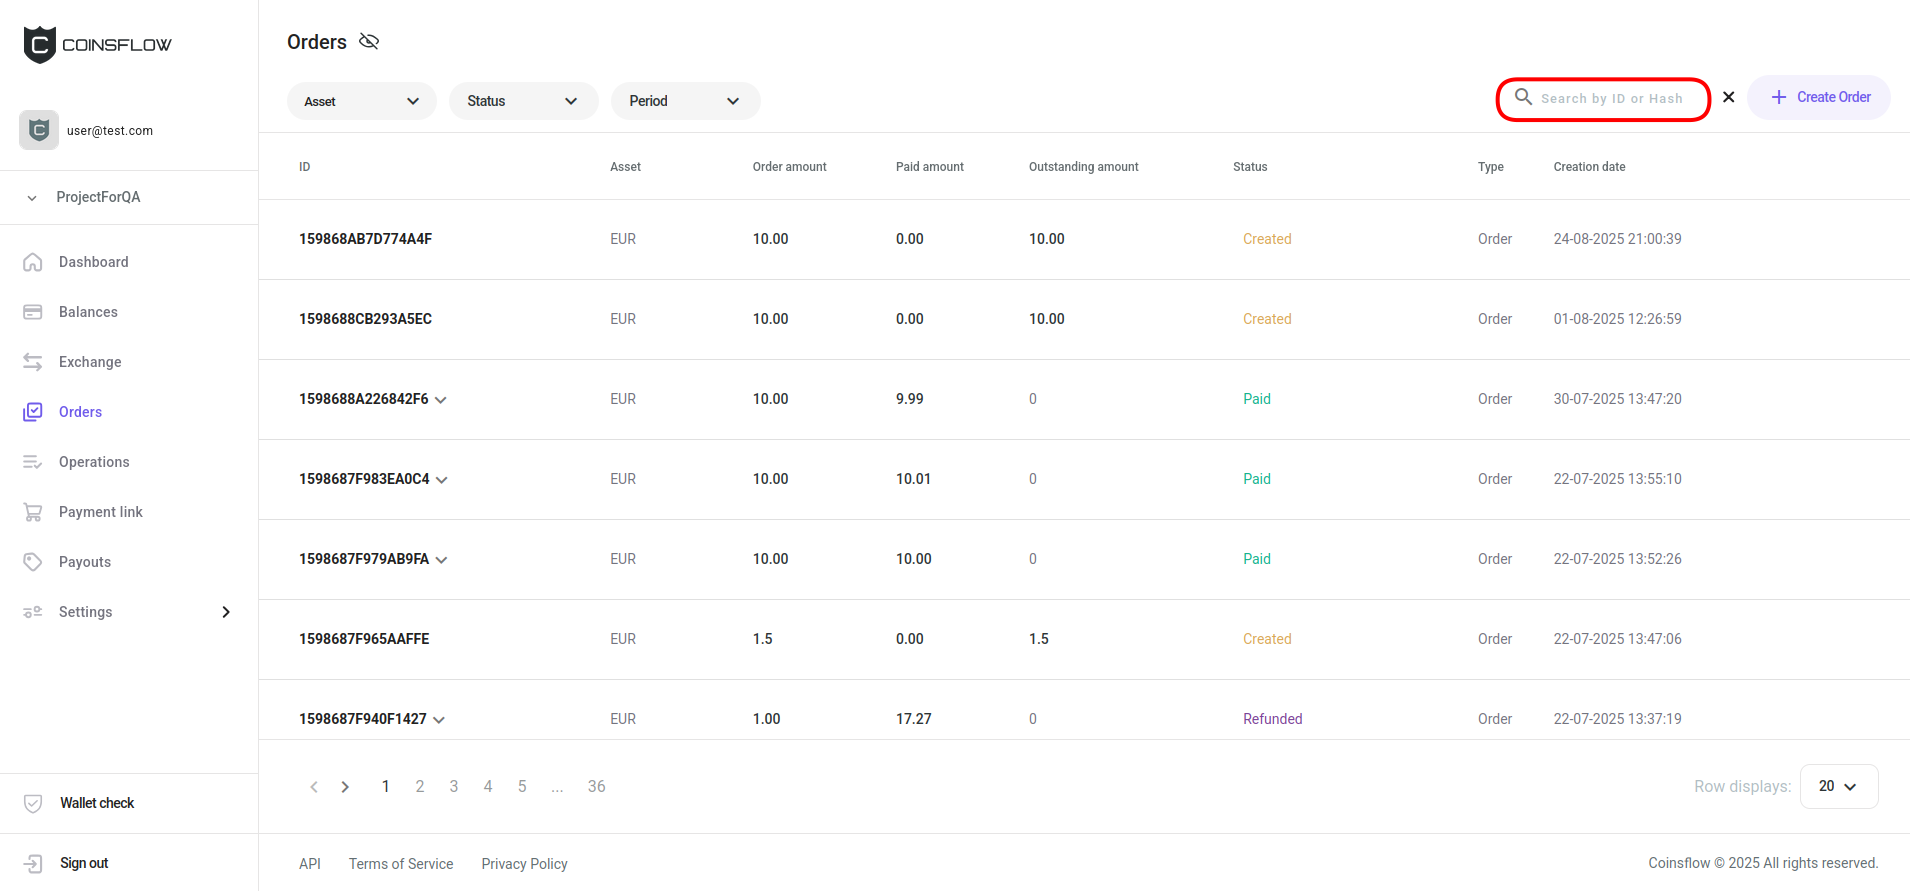
You can search by Order ID, Suboperation ID or Hash.
-
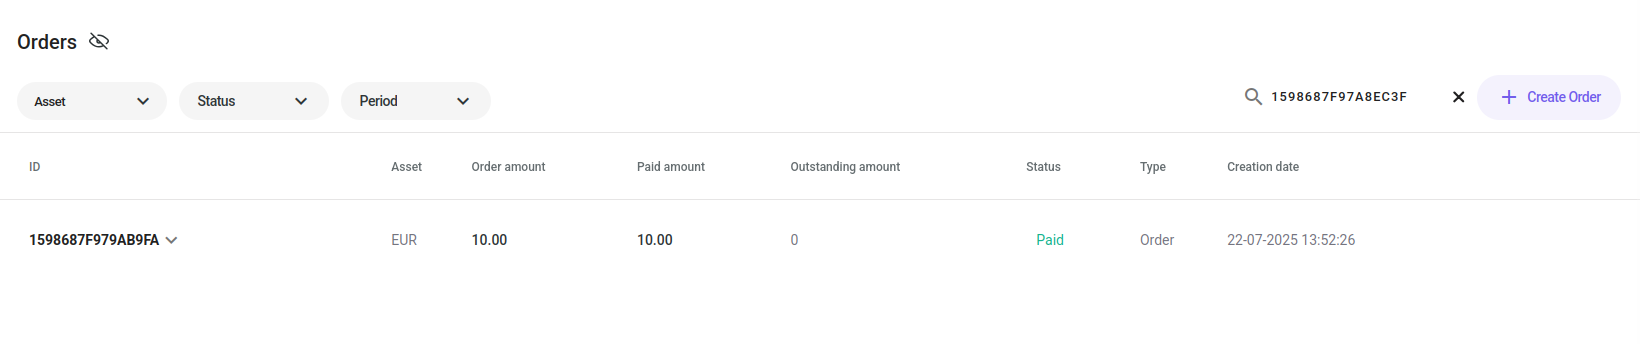
The table displays only the entries that match the inserted text:
- Filter selection:
-
In the top-left corner of the screen you have three drop-down menus:
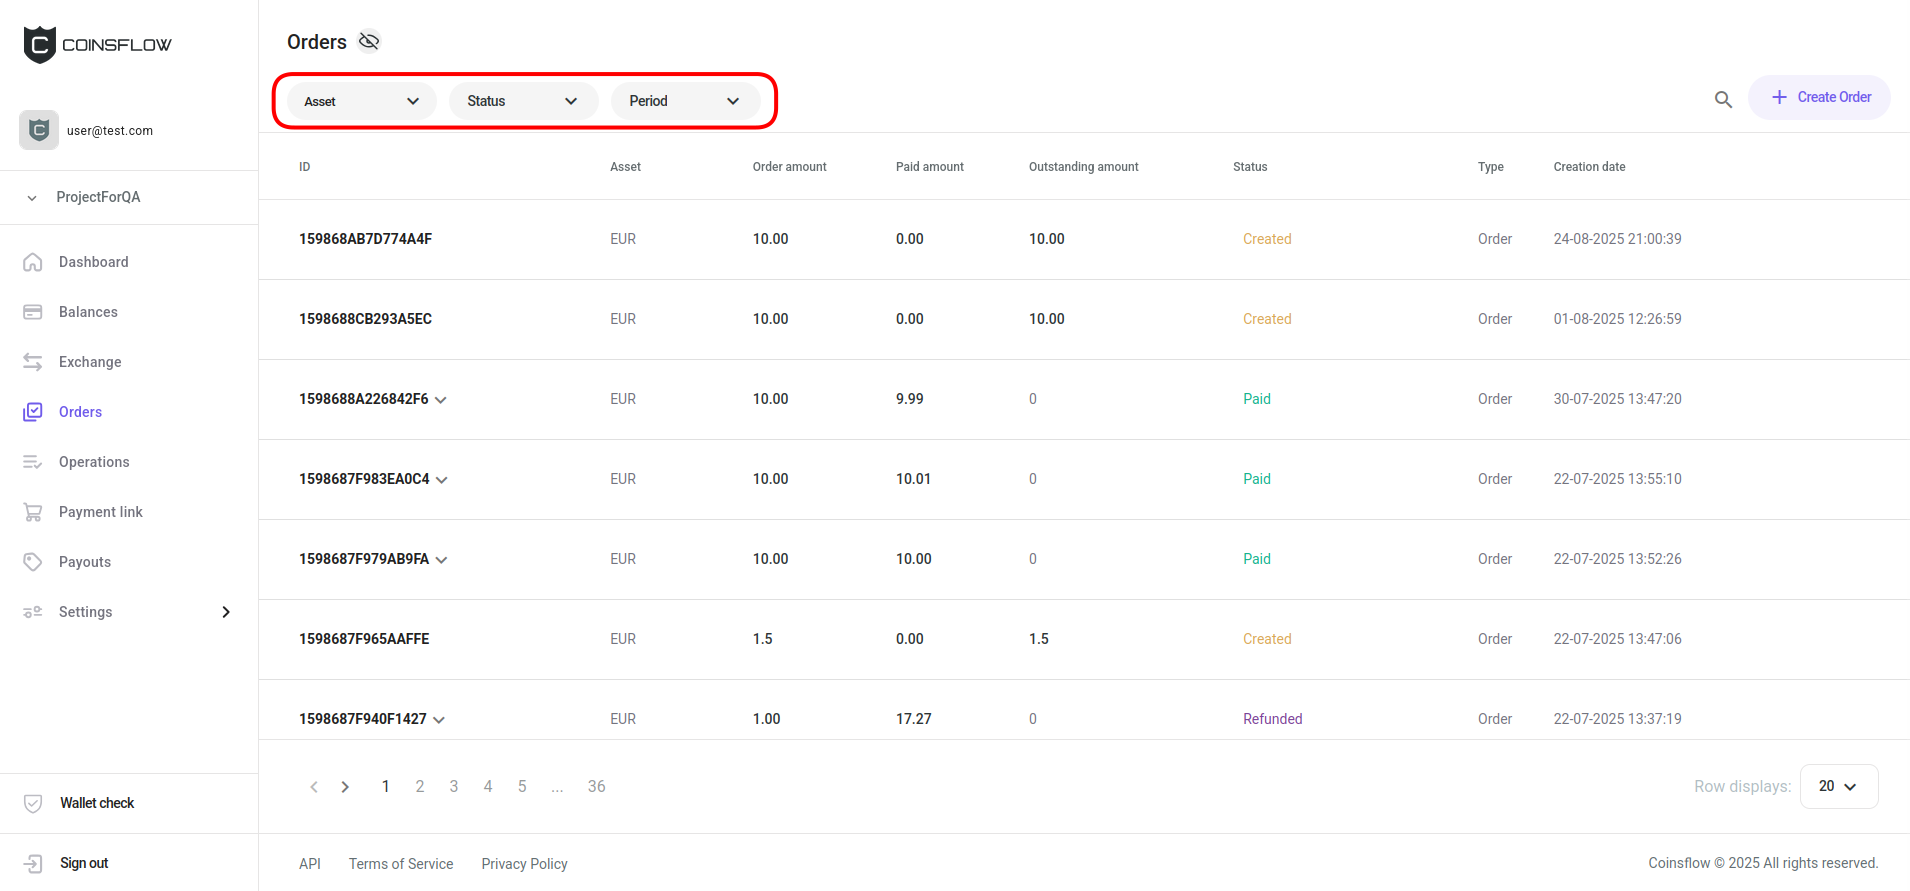
-
Click on the desired asset from the drop-down menu.
-
Click on the desired status from the drop-down menu.
-
Click on the desired period from the drop-down menu.
-
The table only displays the entries that match the selected filters.
Click the title of the desired column to sort the table in ascending or descending order based on that column’s values.
Get a Payment Link
-
Hover over the desired order row on the Orders table and click on the "Options" button:
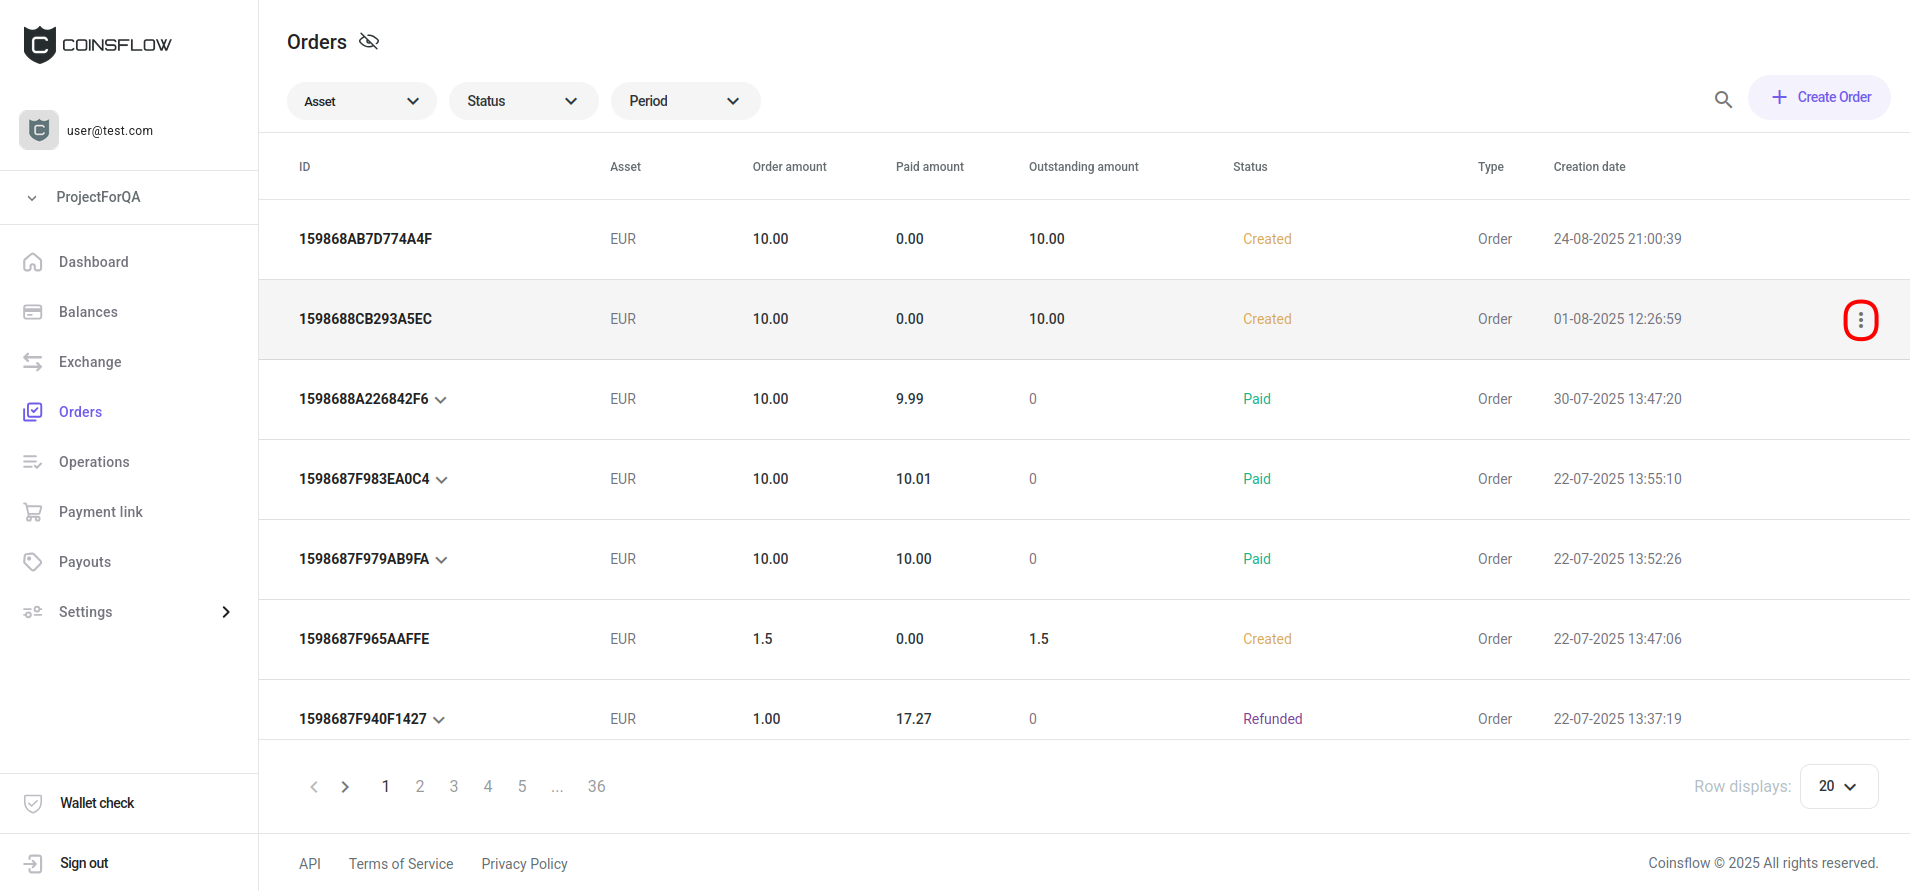
-
Click on "Payment link" from the drop-down menu:
-
A notification is displayed in the bottom-left corner of the screen:

-
Click on the "Copy link" button on the notification.
-
You can paste the link to send it to the desired user.
If the order has the status "underpaid" and you want to request a new payment again, click on "Payment link". The new payment link requests only the amount still pending to reach the "Paid" status.
Setting an Order as Paid
-
Hover over the desired order row on the Orders table and click on the "Options" button:
-
Click on "Mark as paid" from the drop-down menu:
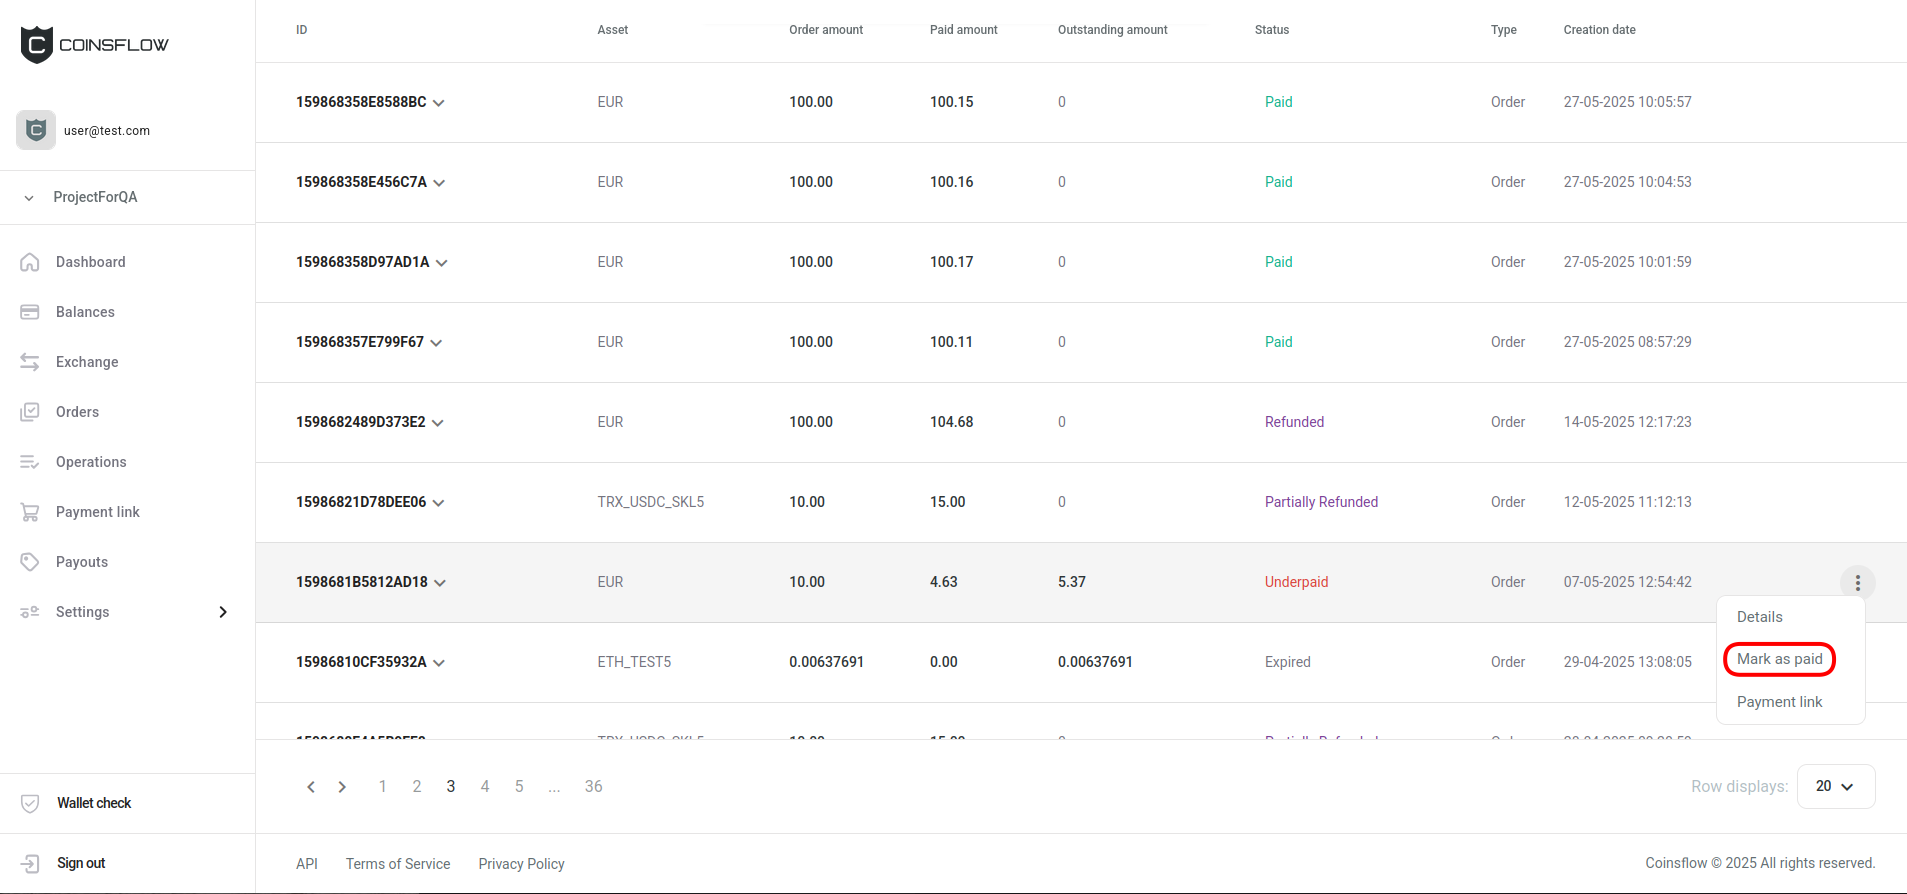
-
The order is closed and marked as "paid".
Order via API
Orders can be created on the Portal and via API as well. Via API, you can use the Create a Order Link endpoint or the Create a Order Deposit endpoint.
To create an Order with a Payment Link:
- Use the Order create endpoint (link).
- Make sure the isSinglePayment parameter is set to False.
- Fill in all the required fields (and any optional field you want) and submit the request to proceed.
- An order is created and a payment link attached to it.
- The payment link is displayed on the response body of the endpoint request.
- You can copy the payment link and send it to the customer.
The Payment Link only becomes active once the end user acesses it, which means that the expiration time of 30 minutes doesn't start until this happens.
To create an Order with a Deposit:
- Use the Create an Order Deposit endpoint (link).
- Fill in all the required fields (and any optional field you want) and submit the request to proceed.
- An Order is created with a deposit attached to it.
- The Response details allows you to either:
- Provide the end user with the deposit address.
- Use any implementation you want to visualize the Terminal for payment.
The Deposit becomes active immediately, which means that the expiration time of 30 minutes begins counting.
Handling scenarios:
-
Mark orders as Paid: You can mark any Order as “PAID” no matter its current status, via the Complete Order endpoint (link).
-
Create a Deposit By requesting a follow-up Deposit (link) for an underpaid Order, the response details can be used to provide the deposit address to the customer (or use any implementation you want to visualize the terminal for payment).
Notifications and Refunds
-
Your customer is always notified of the payment status by email. In case of overpayment, the support team will contact the customer and process the refund.
-
As a Merchant you can configure what payment notifications you receive on the Notifications page.