Payment Link Tab
Payment link is a generated URL that contains all the required information for a operation to be executed. This operation link is generated in the app or via API, based on the inserted information, and it can be used only once for a specific operation process.
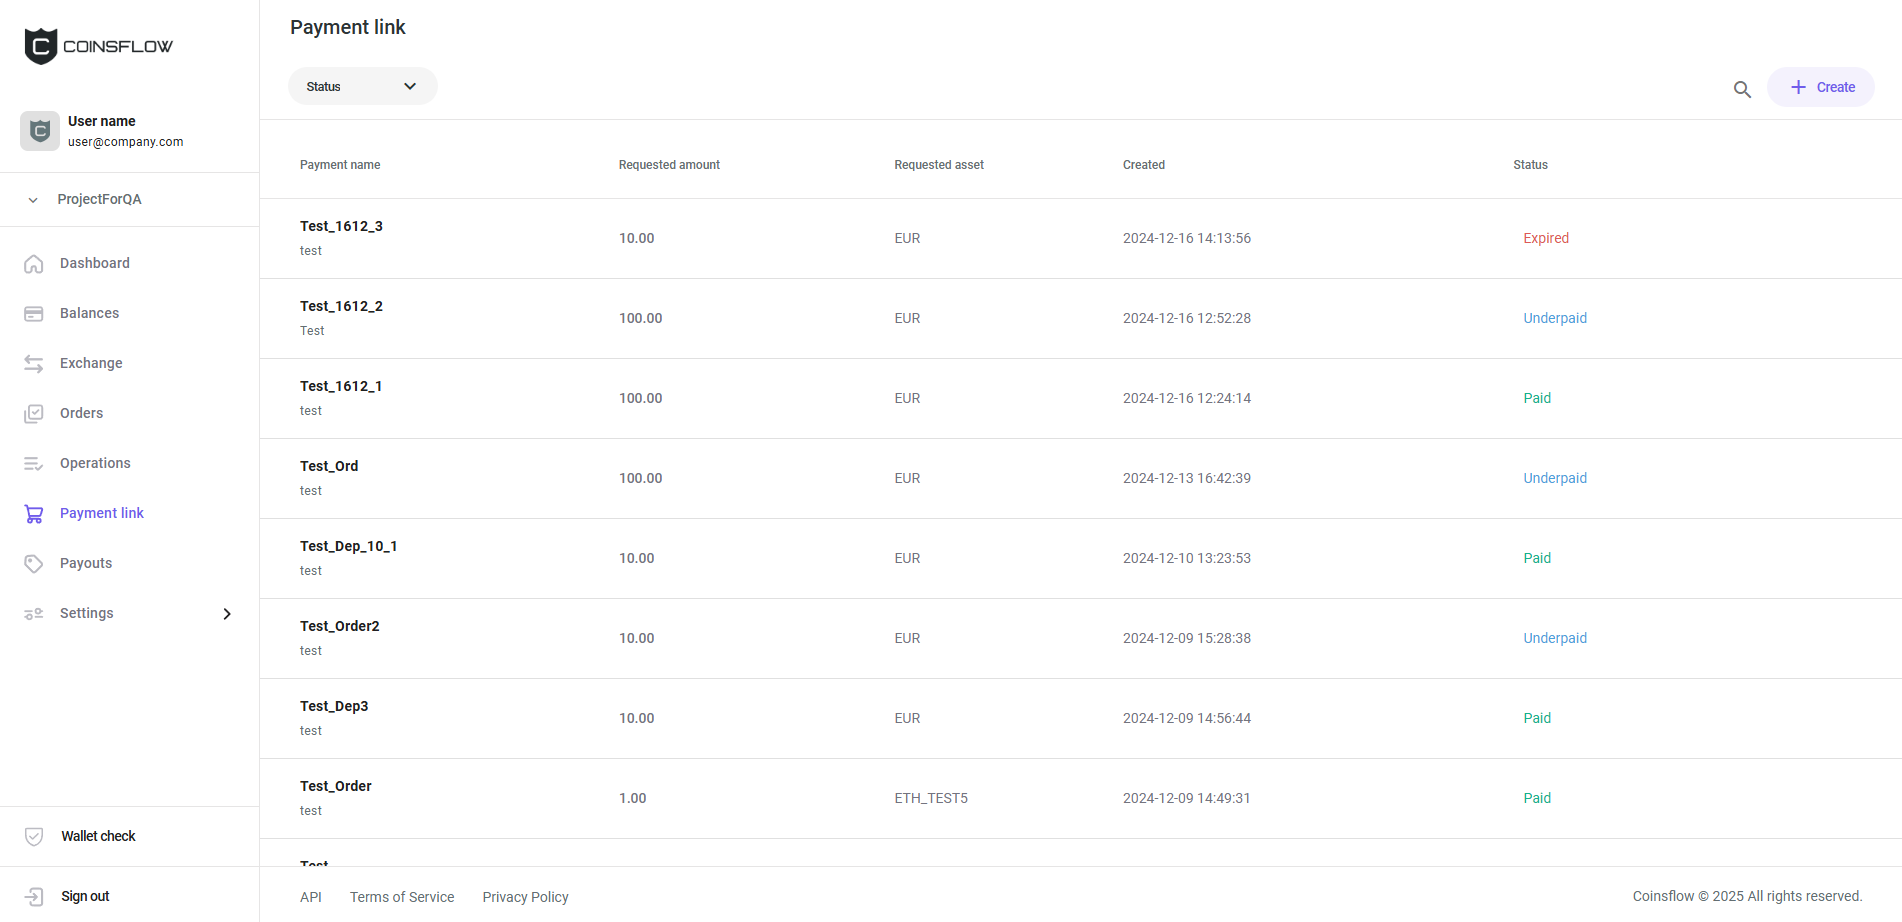
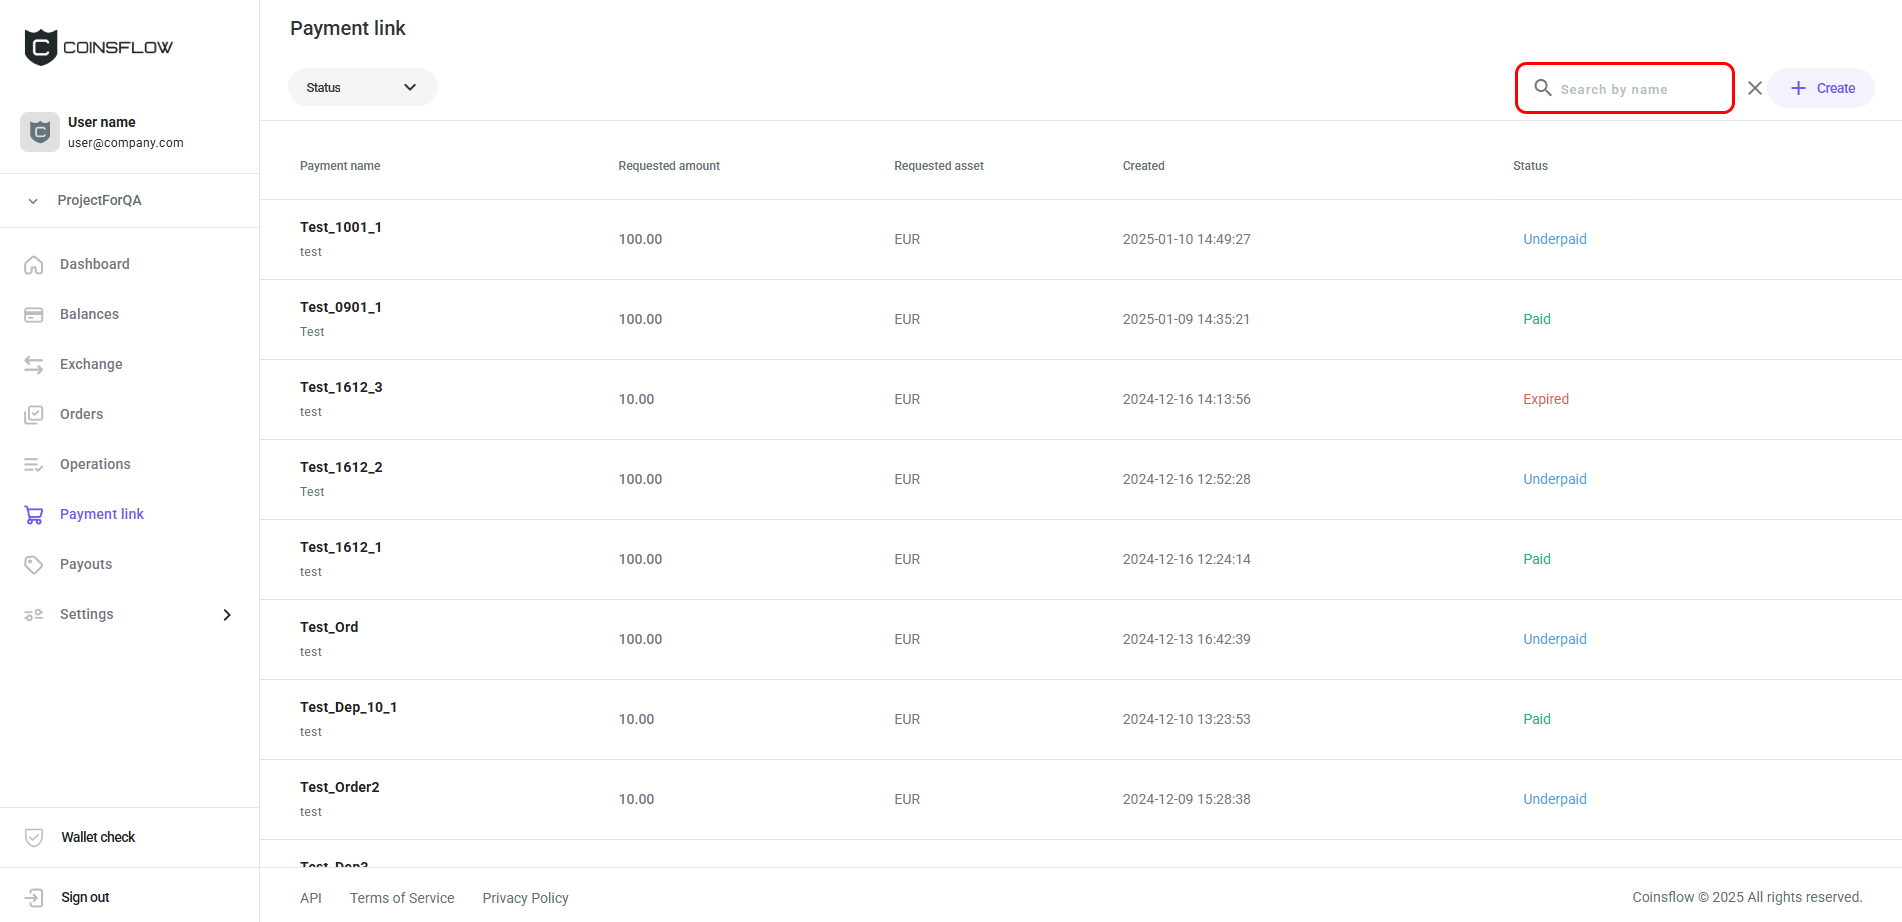
The "Payment links" table displays the following columns:
| Name | Description |
|---|---|
| Payment name | Displays the name given to the payment link. |
| Requested amount | Displays the amount requested as payment in the selected asset (requested asset). |
| Requested Asset | Displays the asset in which the requested amount is set as payment. |
| Created | Displays the date and time the payment link was created. |
| Status | Displays the current status of the payment link from Active, Paid, Failed, Expired. |
On the Payment link tab you can:
Create a Payment Link
-
Click on the "Create payment link" button, in the top-right corner of the screen.
-
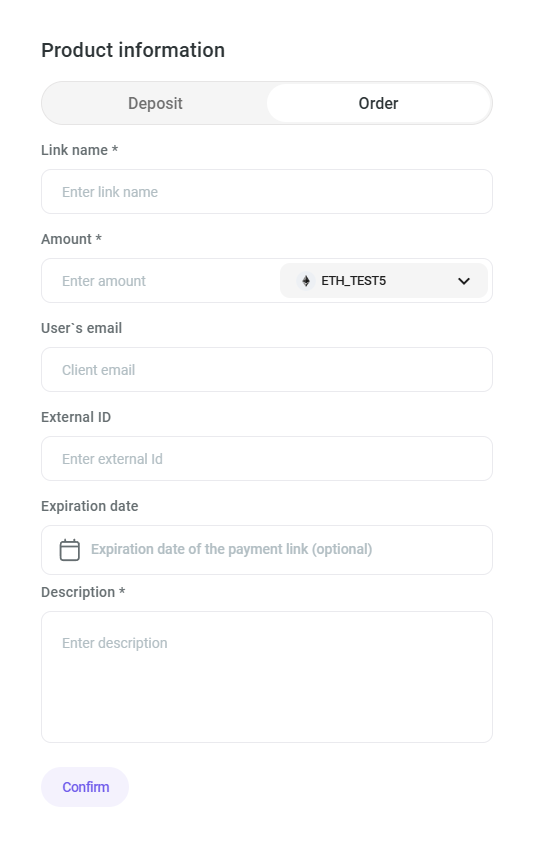
The "Product information" card is displayed:
-
Select between "Deposit" and "Order".
“Deposit” changes to PAID after a transfer is done while “Order” can handle “underpaid/overpaid” scenarios.
If "Order" is selected the user's email is requested.
-
Insert the desired name to identify the product on the application.
-
Insert the desired amount as the product price (this field can be left empty as it is not mandatory).
-
Select the desired crypto currency for the inserted amount.
-
Insert the desired External ID, for external purposes (this field is not mandatory, it can be left blank).
-
Select the desired date until which the link is available (this step is optional).
-
Insert the desired text to describe the product.
-
Click on the "Confirm" button to proceed.
-
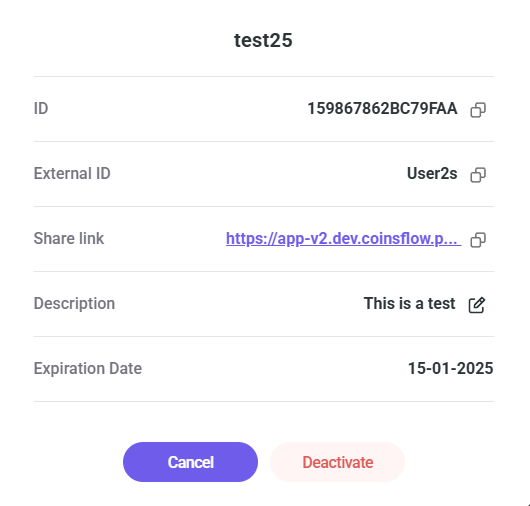
The "Payment link details" pop-up card is displayed:
-
Copy the generated link.
-
Send the link to the desired customer.
To see how the payment link works on the customer side, click here.
Filter the Payment Links Table
There are two ways of filtering the "Payment links" table:
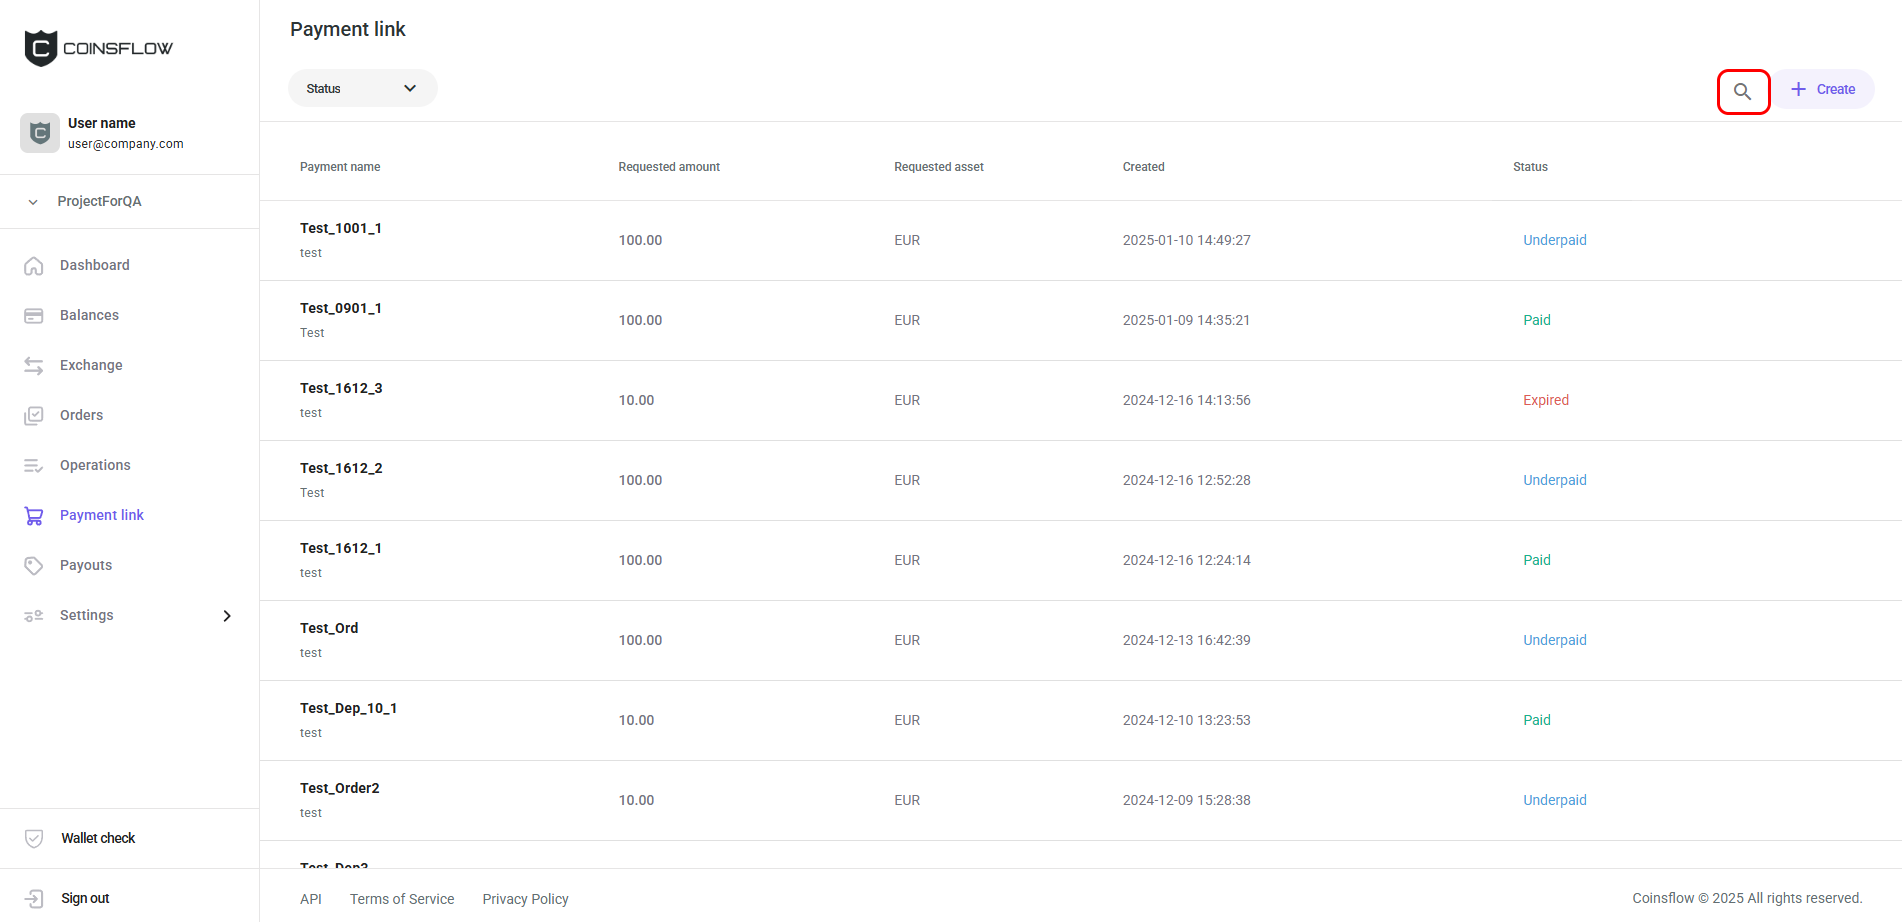
- Search bar:
-
Click on the Search icon:
-
Insert the desired value into the search bar:
You can search by Name.
-
The table displays only the entries that match the inserted text:

- Filter selection:
-
- In the top-left corner of the screen you have a drop-down menu:
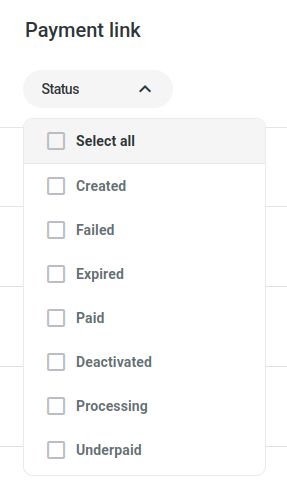
-
Click on the desired status from the drop down menu.
-
The table only displays the entries that match the selected status.
Click the title of the desired column to sort the table in ascending or descending order based on that column’s values.
Duplicate Payment Link as New Deposit
-
Hover over the desired payment link row on the Payment link table and click on the "Duplicate as New Deposit" button of the desired payment link:
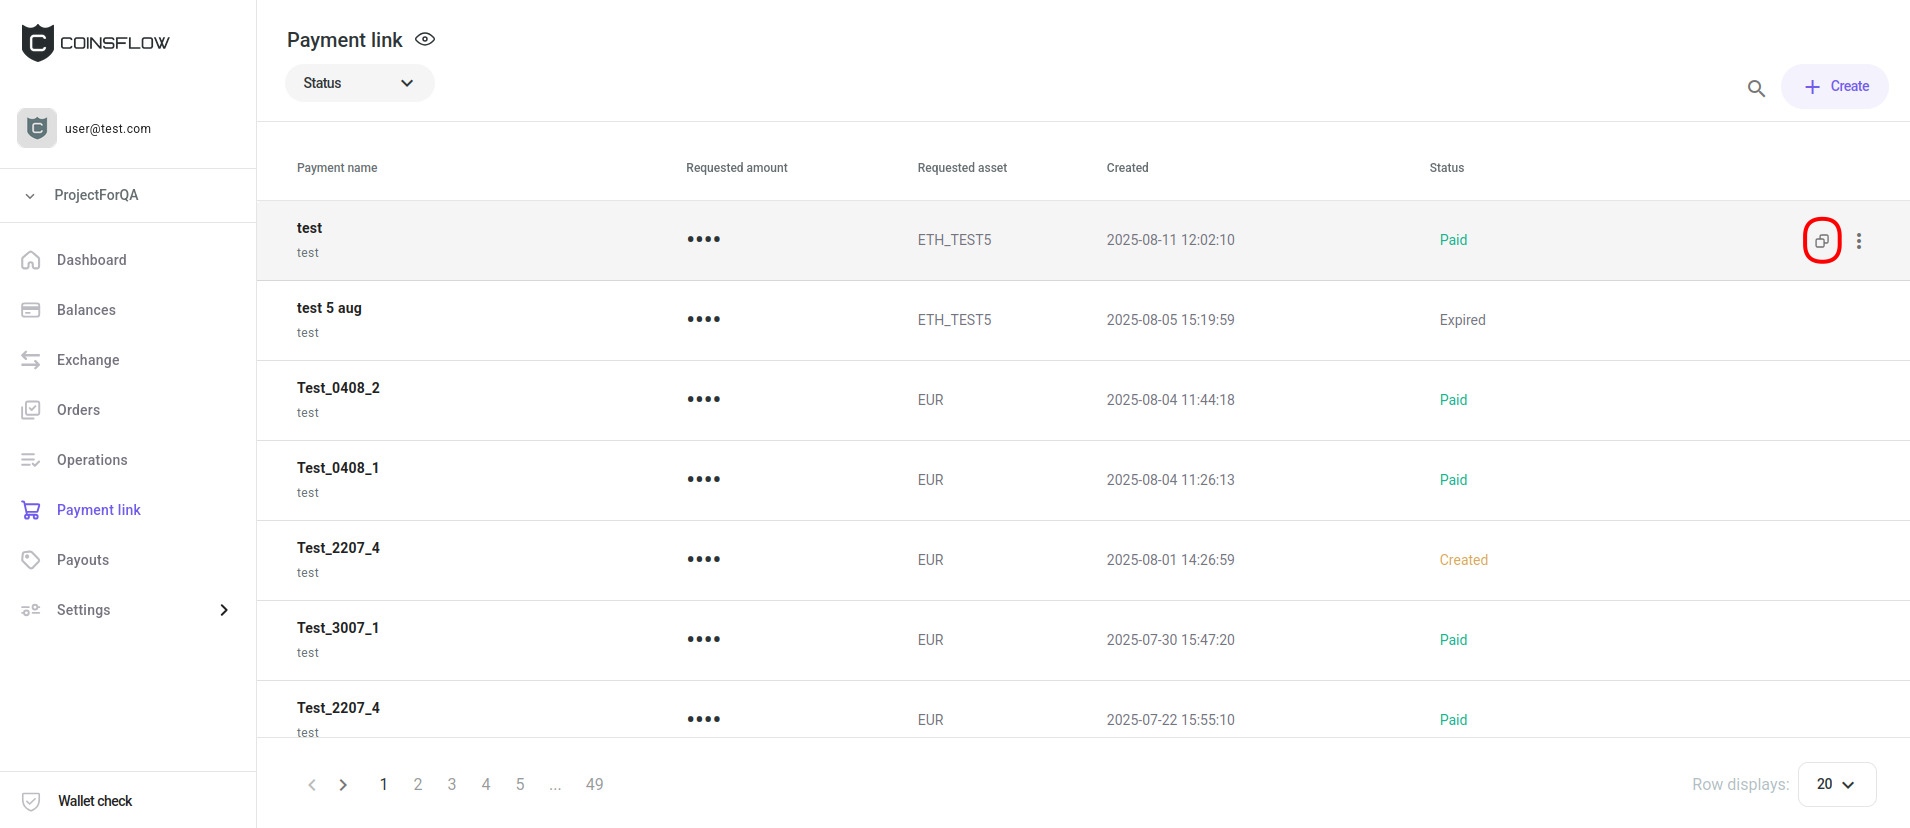
-
The payment link is duplicated and its details are displayed:

See the Payment Link Details
-
Hover over the desired payment link row on the Payment link table and click on the "Options" button of the desired payment link:
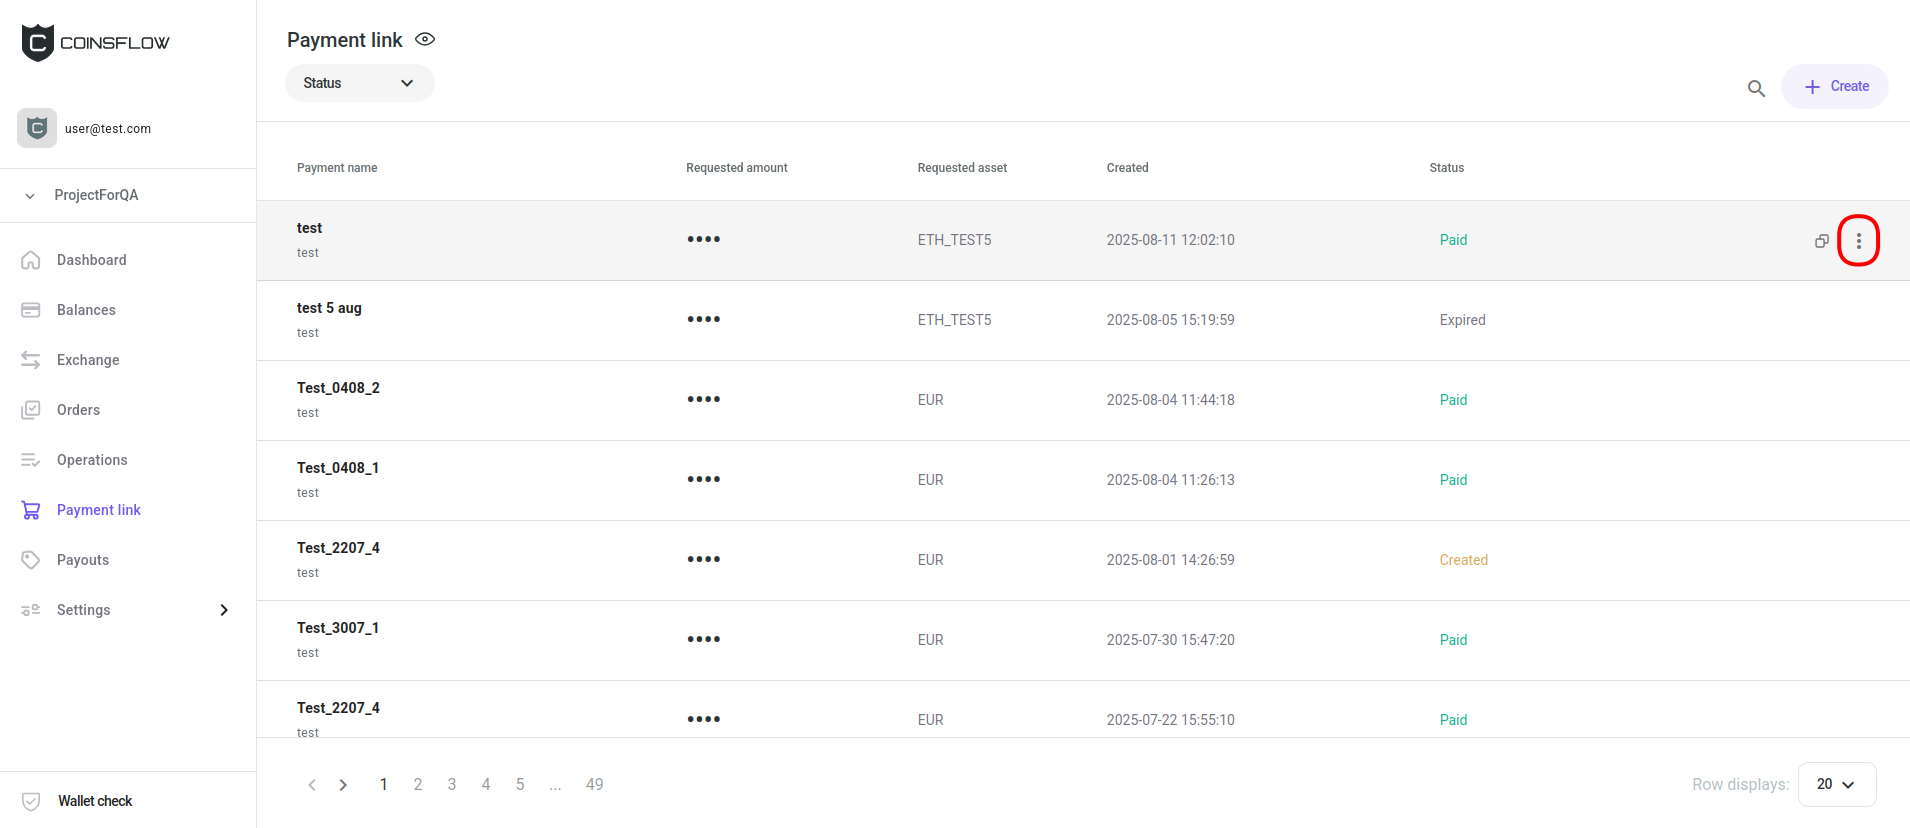
-
The "Product details" card is displayed:
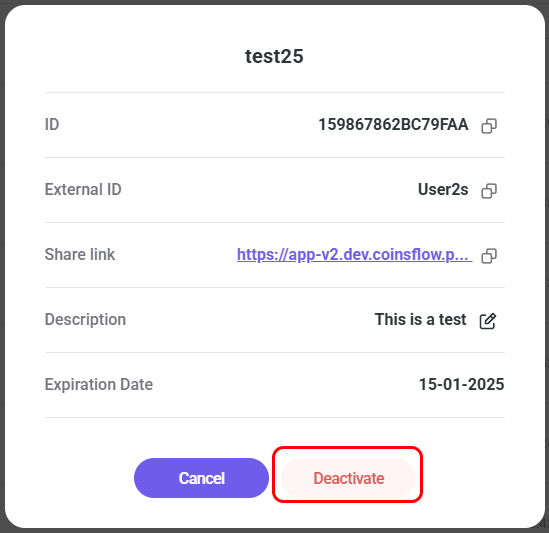
Deactivate Payment Links
-
Hover over the desired payment link row on the Payment link table and click on the "Options" button of the desired payment link:
-
The "Product details" card is displayed:
-
Click on the "Deactivate" button:
-
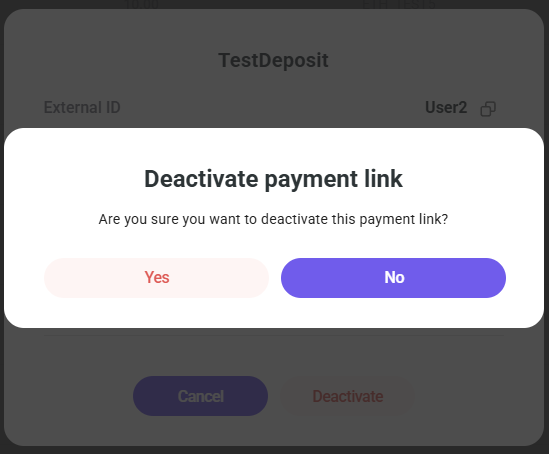
The "Delete payment link" card is displayed, requesting confirmation for the deactivate process:
-
Click on the "Yes" button to proceed.
-
The payment link entry is deactivated and removed from the "Payment link" table.
Notifications and Refunds
-
Your customer is always notified of the payment status by email. In case of overpayment, the support team will contact the customer and process the refund.
-
As a Merchant you can configure what payment notifications you receive on the Notifications page.